on
Physics
- Get link
- X
- Other Apps
Akshay Khanolkar (12C)
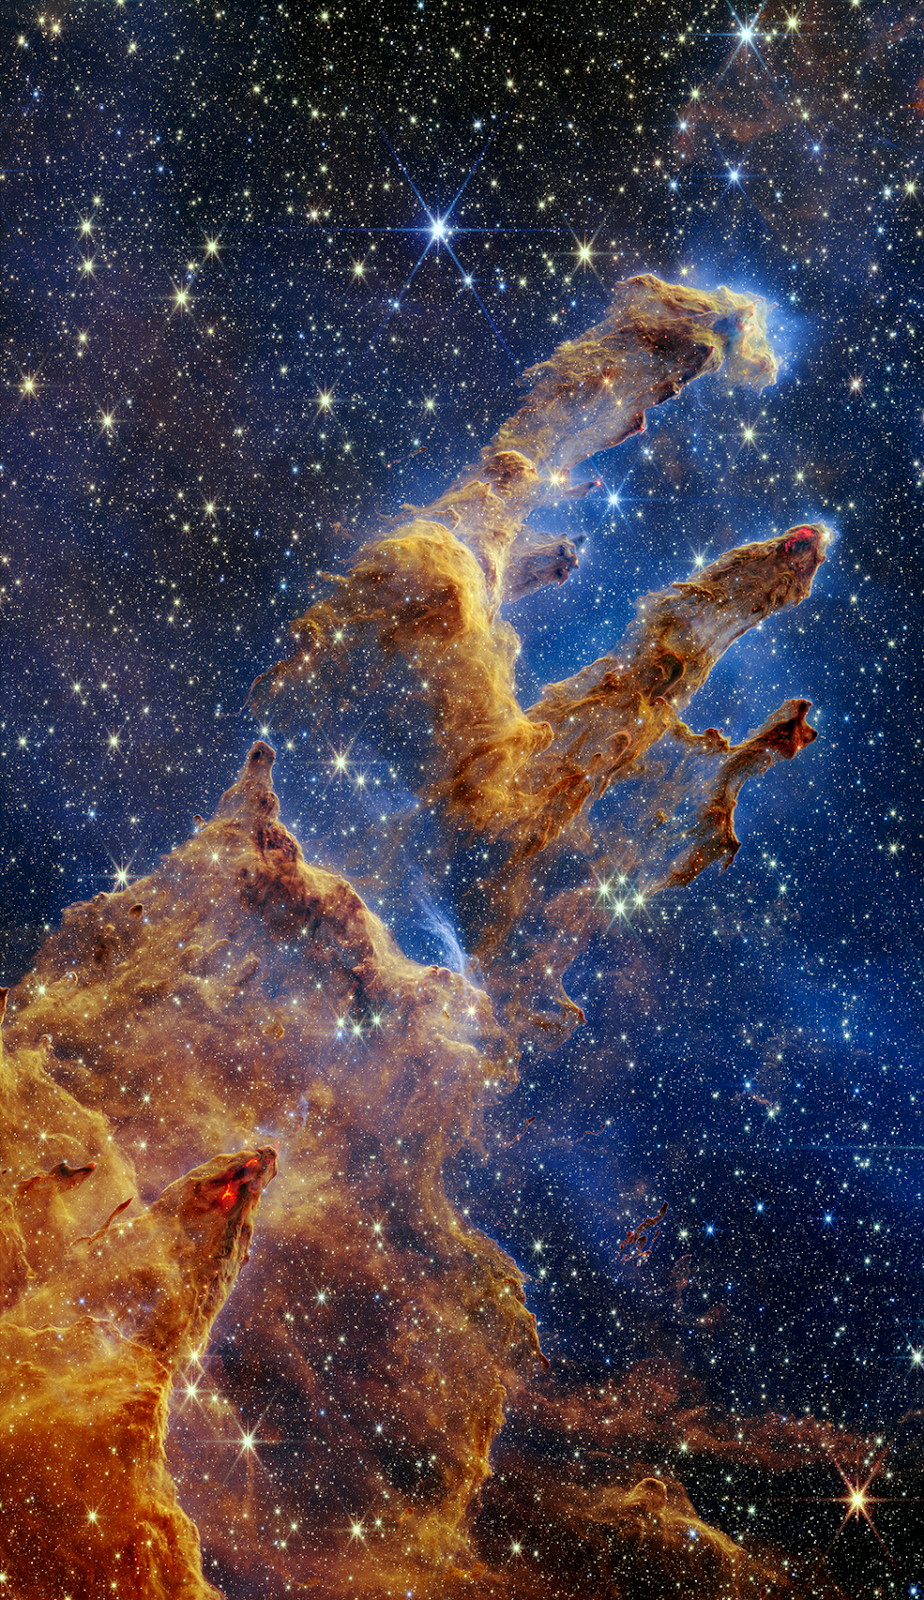
At the writing of this article the James Webb Space Telescope has been in space for over 1 year and 5 months, in that time it has taken some truly spectacular photos bringing out never before seen detail in nebulae and looking for bio-signatures indicative of alien life, on worlds trillions of kilometres away. As stunning as the images the JWST takes, the entire operation is estimated to have an astronomical cost of over $10 Billion. Is there any way for you and me to take an image even remotely resembling what is produced from the JWST?
It is important to note that unlike the Hubble space telescope, every image you have seen from the JWST is a false colour image, this is because the JWST captures light in the infrared part of the spectrum which is invisible to us. To create a colour image the scientists identify which elements are present in parts of the image and assign them a colour, so our image may not resemble the JWST’s at all
Both our and the JWST’s largest priority is the amount of photons that we can capture in total, this allows us to resolve more detail in our photos. In this regard the JWST is at a major advantage with a Main mirror over 400 times larger than anything commercially available for a regular person. The 6.5 metre mirror is so large that it has to be partially folded, to fit into the faring of the Ariane 5 launch vehicle and deployed after launch.
What we cannot make up for in mirror area we will have to compensate for in exposure duration, this determines the time the camera sensor is open to light for. We are now faced with another roadblock, the rotation of the earth. The longer we open our image sensor to light, the more our imaging deviates from their original position and starts to bleed into other pixels creating star trails and a blurry image.
The JWST solves this issue by being launched into the Earth-Sun L2 Lagrange point (An area where the gravitation from the Earth and the Sun are equal in magnitude). Unrestricted by the rotation of the earth, it is not uncommon for the JWST to take images with an exposure time of over 24 hours.
We however do not have the luxury of being able to launch our imaging setup into outer space and will need to counteract the rotation of the earth in some other way. The solution is a special type of telescope mount called the German equatorial mount. This design, invented in 1824 by Joseph von Fraunhofer, aligned its axis with the celestial pole. By rotating our telescope about this axis, called the right ascension, at 1 revolution per day we can counteract the rotation of the earth.
Our second priority is to reduce any clutter and noise that may destroy any detail that is in our image. This is primarily caused by light pollution and will limit the time we can expose our image before it becomes washed out. The most common solution to this problem is to simply move out into an area with much darker skies. Now that this has been achieved we still have to contend with the numerous other factors that can affect our image quality such as: aircraft light, satellite flare, meteors, atmospheric conditions, thermal noise etc.
By virtue of being located over 1.5 million km away from us most of these factors do not apply to the JWST except one, thermal noise. To prevent the effects of thermal noise the JWST uses a 5 layered tennis court sized sun shield to stop any radiation from the sun from hitting the main mirror. The JWST also uses a cryogenic helium to actively cool the camera sensors to a temperature of only 7 kelvin.
We are going to need a more down to earth solution however, most of our problems can be solved by taking multiple shorter images of our target and then averaging out the data from all the images. This should remove any physical artefacts in our image such as aircraft lights and also remove any random noise. Thermal noise, and dead pixels are not resolved by this method. To remedy this we are going to take calibration frames.
The first type of calibration frame is known as the dark frame, many modern cameras already automatically take one of these when set to night mode. This is done by simply putting an opaque object in front of the lens of the camera and taking a photo with the same settings as the target was shot with. If we were to look at a dark frame without any additional post processing it would simply look like a black background, by increasing the contrast we can see a specific pattern caused by thermal noise which is unique to each camera.
The next type of calibration frame we are going to take is the Bias frame, this is done at the exact same setup as the dark frame however the shutter speed (the time the camera sensor can detect light for) is to be set to the fastest possible. By increasing the contrast on the calibration frame we would see a black background dotted with pixels of random colour, these are caused by defects in the CMOS sensor and are dubbed dead pixels.
The final calibration frame is the flat frame. This is done by applying a uniform light over the lens of the camera (often crudely done by tying a white t-shirt over the telescope lens and pointing it at an iPad with a white background). By doing this, the visual defects from stains on our lens, dust on the camera sensor or vignetting can be compensated for in our final image.
The JWST has built-in sensors that can detect read noise in each of its 3 cameras that are used to take calibration frames.
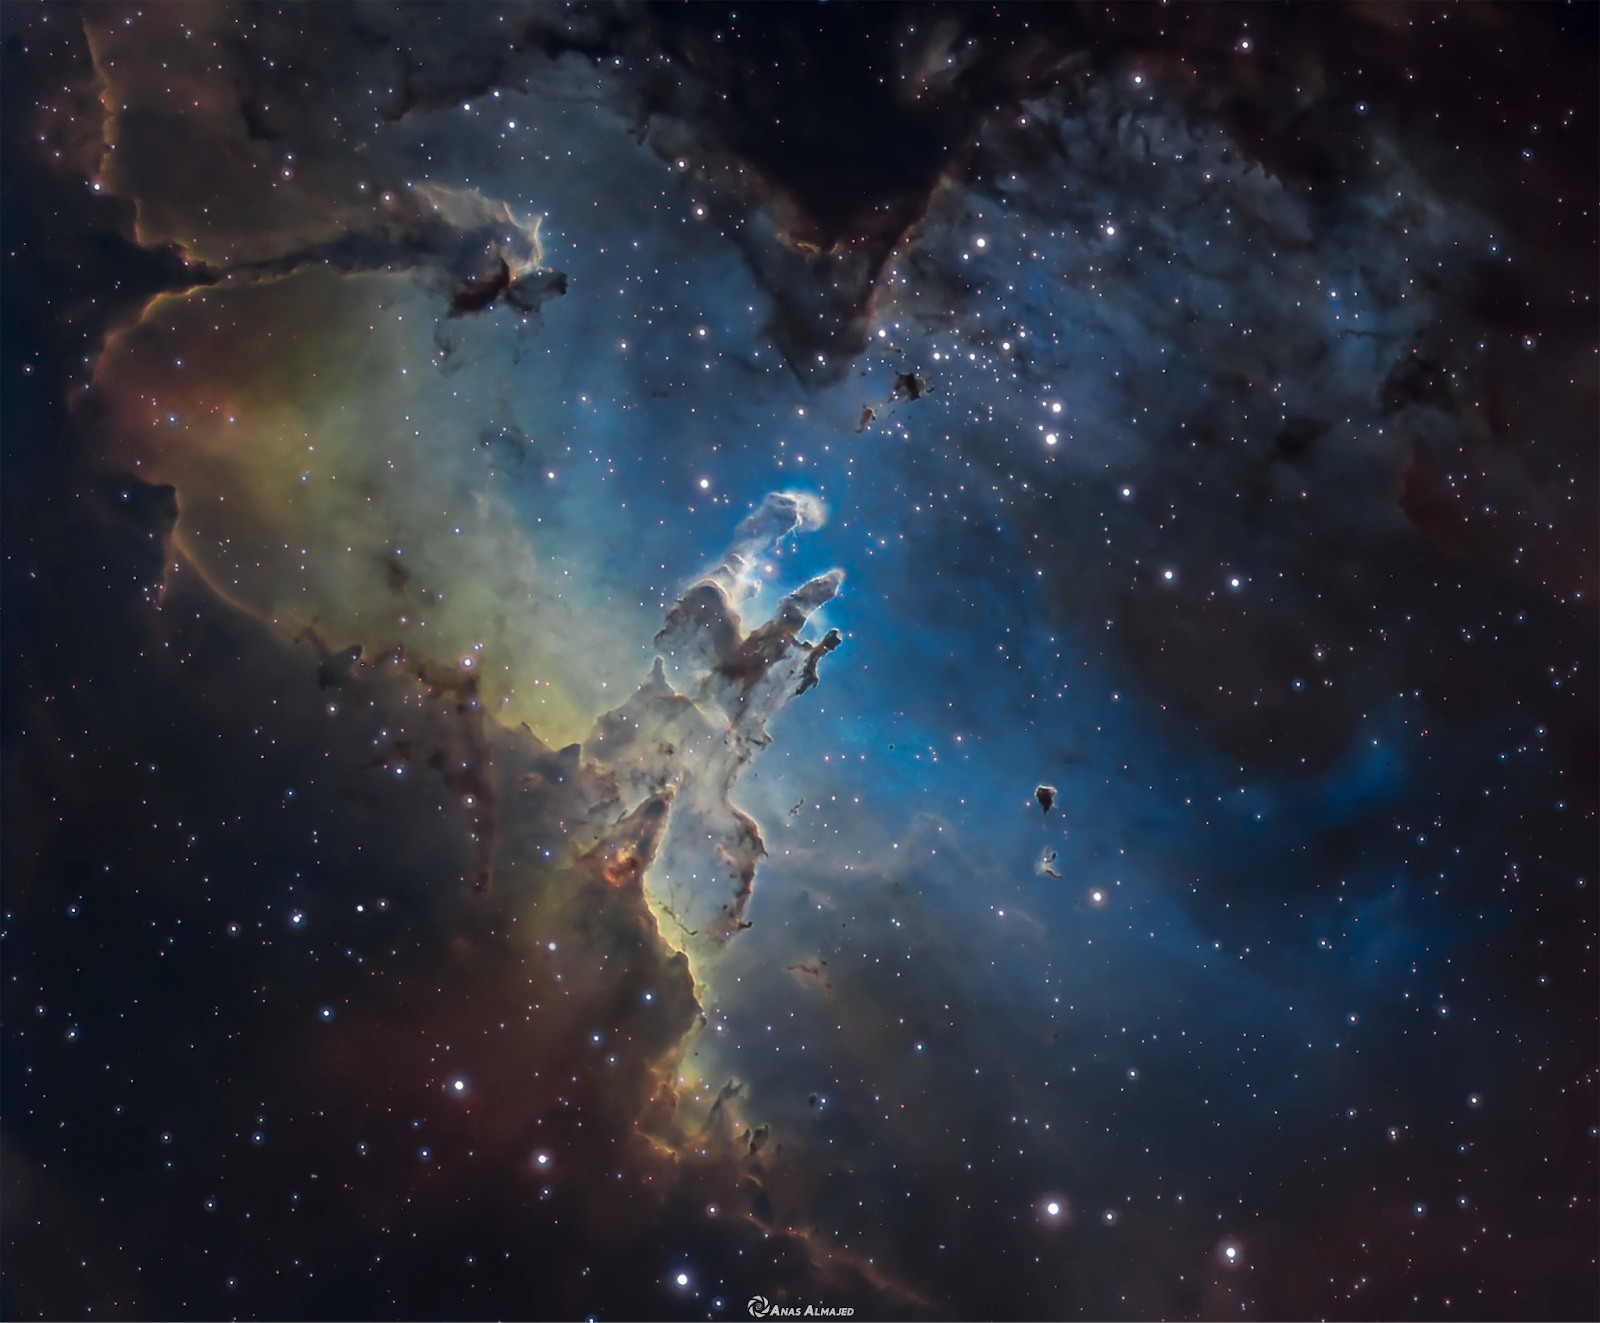
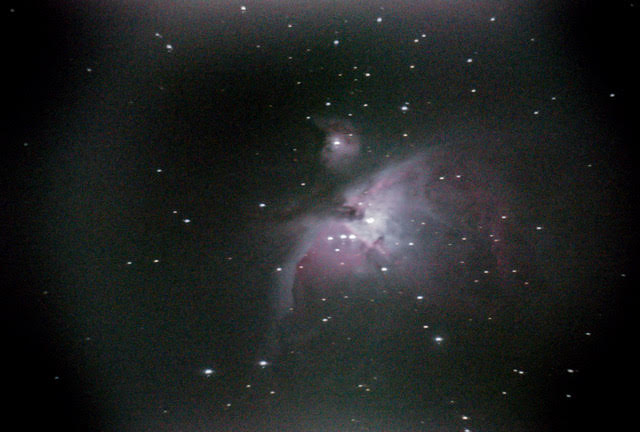
Now that all of our photos and calibration frames have been taken we can use an astrophotography software to stack our target images together and subtract all noise from our image to produce a final image similar to the one I took of the Orion nebula.
Comments
Post a Comment